
Background
Oracle Integration provides native connectivity to Oracle and non-Oracle Software as a Service (SaaS) and On-premises applications, such as Oracle ERP Cloud, Oracle Service Cloud, Oracle HCM Cloud, Salesforce.com, Workday, EBS, SAP, NetSuite and so on. Oracle Integration adapters simplify best practice connectivity to these applications by handling many of the underlying technical complexities often encountererd when integrating applications.
Use Case
This lab describes how to use Oracle Integration with Oracle ERP Business Intelligence Publish (BIP) report.
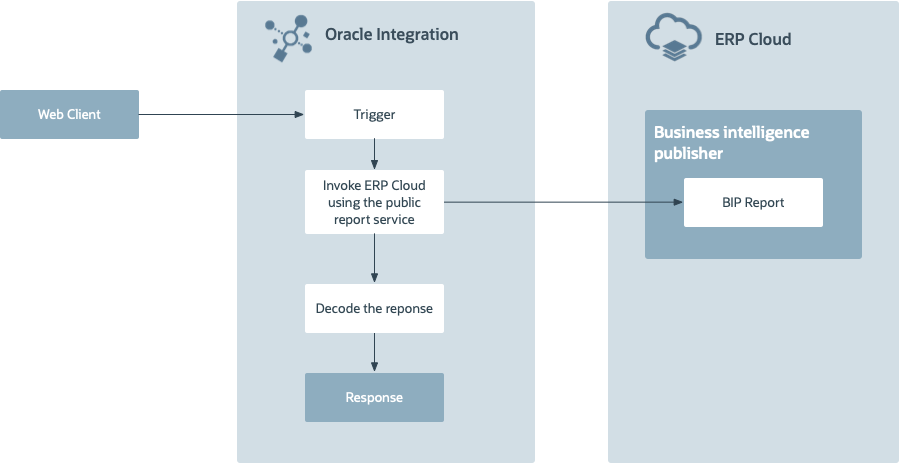
The user creates a report in Oracle ERP Cloud and uploads it to a shared folder. Oracle Integration connects to the ERP BIP service, pulls the report, decodes the response, applies the required transformations and writes it into the REST client.
The following diagram shows the interaction between the different systems in this use case:
Before You Begin
Some steps in this tutorial have a  icon next to them. Click this
icon to copy the snippet of text to your clipboard and then paste where needed.
icon next to them. Click this
icon to copy the snippet of text to your clipboard and then paste where needed.
Your instructor will provide you the information you need to access the environments used in this lab.
For this lab we will provide you the following:
- Oracle Integration
- ERP Cloud
Get Your Oracle Integration (OIC) Environment
Select your OIC Environment and enter your User Number to get the information needed to access Oracle Integration.
- OIC URL:
- OIC User Name:
- OIC Password: Your password will be provided by the instructor.
Sign In
-
Open your Oracle Integration instance.
Enter your user name and password.
Your password will be provided by the instructor.Click Sign In.
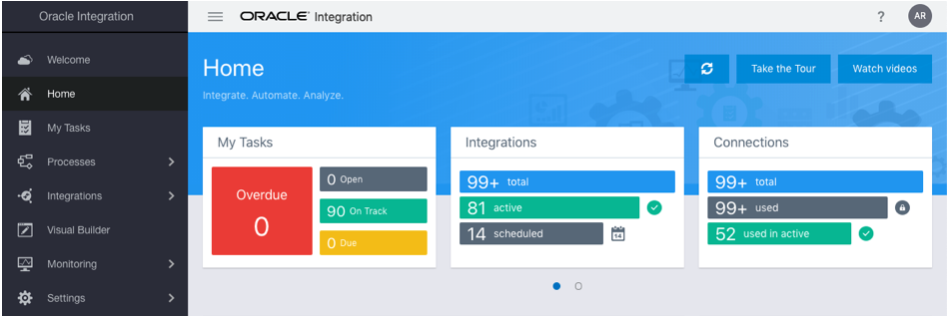
The Home page appears.
You are now logged in and ready to use Oracle Integration.
Create the Short BIP Report Integration
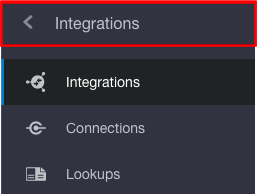
- On the Home page, click Integrations, and then click Integrations.
- On the Integrations page, click Create.
- In the Select Integration Style dialog, select App Driven Orchestration.
- Click Select.
- In the Create New Integration dialog, configure the integration:
What do you want to call your integration?
Enter
Short BIP Report-
In the What does this integration do? field, enter:
This integration shows you how to connect to the ERP BIP service, pulls a report, decodes the response, and return the report results.
- Click Create.
Create the REST Trigger
- Hover over START and click
 .
. - Begin typing
REST Interfacein the Search field to find the connection to your REST interface. -
Select the connection named
REST Interface.The Configure REST Endpoint wizard appears.
- Name your endpoint
ShortBIPReport. -
In the What does this endpoint do? field, enter:
This endpoint defines the REST interface. - Click Next.
- On the Resource Configuration page, configure the following properties:
- What does this operation do?:
Retrieves ledgers from the ERP system. - What is the endpoint's relative resource URI:
/BIP - What action do you want to perform on the endpoint?: select GET.
- Select Add and review parameters for this endpoint.
- Select Configure this endpoint to receive the response.
- What does this operation do?:
- Click Next.
On the Request Parameters page, in the Specify Query Parameters section, click
.A new row appears.
- In the Name column, enter
LedgerName. - From the list in the Data Type column, select string.
In the same way, create a Query Parameter named
ReportAbsolutePathof type string.- Click Next.
On the Response page, configure the following values:
From the Select the request payload format list, select JSON Sample.
- Click the <<<inline>>> link.
- Enter the following JSON sample:
[ { "LEDGERNAME" : "US Primary Ledger", "SEGMENT3" : 31, "SEGMENT4" : 21, "FIN_CATEGORY" : "FREIGHT" }, { "LEDGERNAME" : "US Primary Ledger", "SEGMENT3" : 31, "SEGMENT4" : 21, "FIN_CATEGORY" : "FREIGHT" } ] - Click OK.
-
Click Next.
A summary of the properties you configured appears.
- Review the summary and click Done.
-
On the Integration canvas, from the Layout list, select Horizontal.

- Click Save to save the integration.
Get the BIP Report
- Hover over the outgoing arrow for the ShortBIPReport activity and click
.
- Begin typing
ERP Cloud External Report Servicein the Search field. - Select ERP Cloud External Report Service.
- In the Basic Info page, name your endpoint
GetBIPReport. - Click Next.
- On the Operations page, from the Select the Operation list, select runReport.
- Click Next.
- On the Headers page, click Next.
- Review the summary and click Done.
- Click Save to save the integration.
Define the Data Mapping
A Map action named Map to GetBIPReport is automatically created. We'll define this data mapping.
- Select the Map to GetBIPReport action.
Click
 .
.The Data Mapping page appears.
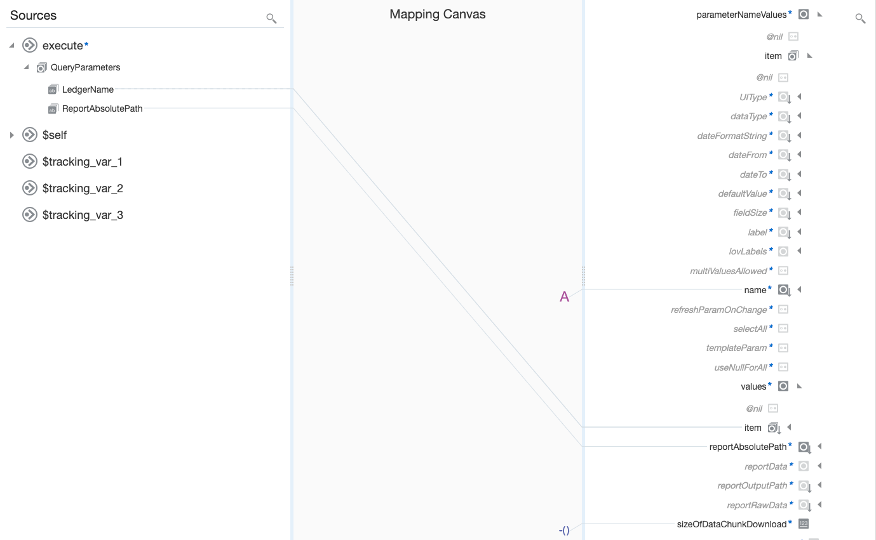
- In the Sources section, expand execute, and then QueryParameters.
- In the Target section, under OutboundSOAPRequestDocument expand Body, and then expand runReport.
Map the ReportAbsolutePath field:
- In the Target section, expand reportRequest.
Map the ReportAbsolutePath field in the Sources section, to the reportAbsolutePath field in the Target section.
Assign a value to the name field:
- In the Target section, expand parameterNameValues, and then expand item.
- Right click the name field.
- Click Create Target Node.
- In the Expression for name panel, enter
"LedgerName". - Click
 .
.
- In the Target section, under parameterNameValues expand values.
-
Map the LedgerName field in the Sources section, to the item field located under values in the Target section.
Assign a value to the sizeOfDataChunkDownload field:
- Right click the sizeOfDataChunkDownload field.
- Click Create Target Node.
- In the Expression for sizeOfDataChunkDownload panel, enter
-1. - Click .
-
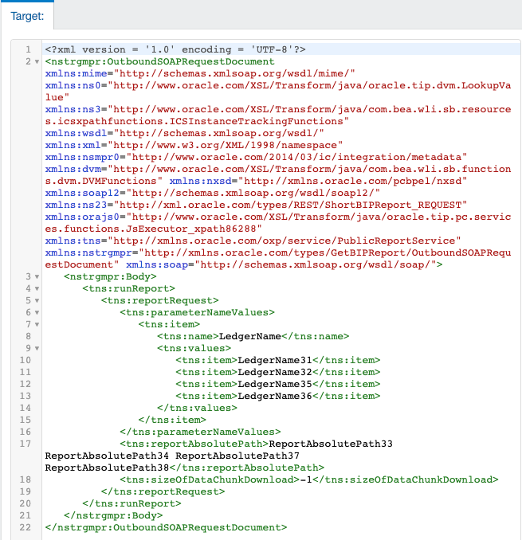
Your map should like this:
Click Validate.
A confirmation message appears.
- Click
 Test.
Test.
- Click
 Generate Inputs.
- Click
 Execute.
-
Verify the Target payload contains sample data for the data elements you mapped. Specifically:
- name
- item
- reportAbsolutePath
- sizeOfDataChunckDownload
- Click Close.
- Click Save to save the integration.
Write the File
- Download the opaque_schema.xsd file.
- Hover over the outgoing arrow for the GetBIPReport activity and click .
- Type
Stage Filein the Search field. Select the action named Stage File.
- In the Basic Info page, name your action
StageFileWrite. - Click Next.
On the Configure Operation page, from the Choose Stage File Operation list, select Write File.
-
Specify the file name:
Click
next to the Specify the
File Name field.The Configure Stage File Action dialog appears.
- In the Expression field, enter
"temp.csv". Click Save.
A confirmation message appears.
- Click OK.
- Click Exit Expression Builder
-
Specify the output directory:
Click
next to the Specify the
Output Directory field.The Configure Stage File Action dialog appears.
- In the Expression field, enter
"/tmp". Click Save.
A confirmation message appears.
- Click OK.
- Click Exit Expression Builder
- Click Next.
- On the Schema Options page, select XML Schema (XSD) document
- Click Next.
- On the Format Definition page, click Choose File and
select the
opaque_schema.xsdyou downloaded. - Click Next.
- Review the summary and click Done.
- Click Save to save the integration.
Define the Data Mapping
A Map action named Map to StageFileWrite is automatically created. We'll define this data mapping.
- Select the Map to StageFileWrite action.
Click
.The Data Mapping page appears.
- In the Sources section, expand $GetBIPReport, then runReportResponse, and then runReportReturn.
- Map the reportBytes field in the Sources section, to the opaqueElement field in the Target section.
Click Validate.
A confirmation message appears.
- Click Close.
- Click Save to save the integration.
Read the File from Stage
- Download the GLCCReport.csv file.
-
Click
 and from the Data section, drag and drop Stage File to
the Integration canvas,
and place it after the StageFileWrite activity.
and from the Data section, drag and drop Stage File to
the Integration canvas,
and place it after the StageFileWrite activity.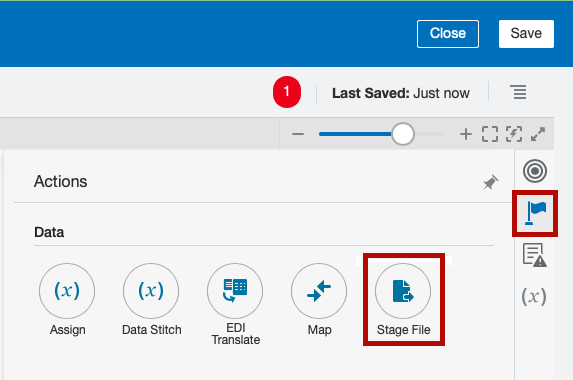
The Configure Stage File Action wizard appears.
- On the Basic Info page, name the activity
ReadFileFromStage. - Click Next.
On the Configure Operation page, from the Choose Stage File Operation list, select Read Entire File.
-
Specify the file name:
Click
next to the Specify the
File Name field.The Configure Stage File Action dialog appears.
- In the Expression field, enter
"temp.csv". Click Save.
A confirmation message appears.
- Click OK.
- Click Exit Expression Builder.
-
Specify the output directory:
Click
next to the Specify the
Output Directory field.The Configure Stage File Action dialog appears.
- In the Expression field, enter
"/tmp". Click Save.
A confirmation message appears.
- Click OK.
- Click Exit Expression Builder.
- Click Next.
- On the Schema Options page, click Next.
On the Format Definition page, specify the following values:
- Click Choose File and select the
GLCCReport.csvfile you downloaded. - In the Enter Record Name field, enter
Ledger. - In the Enter Recordset Name field, enter
LedgerSet.
- Click Choose File and select the
Click Next.
A summary of the properties you configured appears.
- Review the summary and click Done.
- Click Save to save the integration.
Define the Data Mapping
A Map action named Map to ShortBIPReport is automatically created. We'll define this data mapping.
- Select the Map to ShortBIPReport action.
Click
.The Data Mapping page appears.
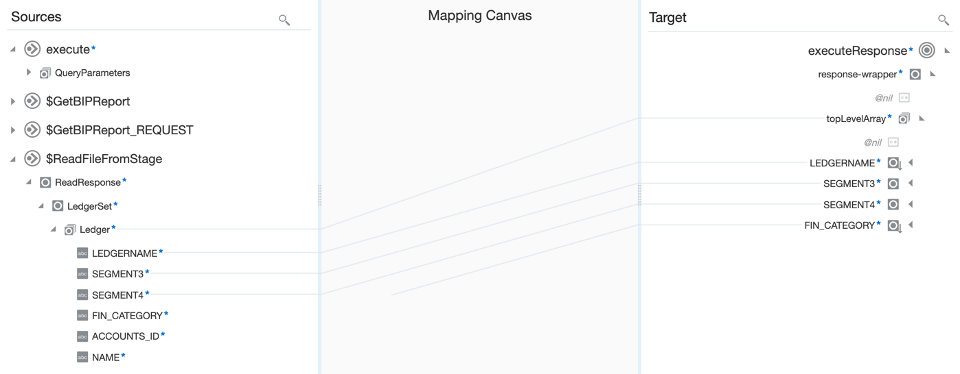
- In the Sources section, expand $ReadFileFromStage, then ReadResponse, and then LedgerSet.
- In the Target section, expand response-wrapper.
- Map the Ledger field in the Sources section, to the topLevelArray field in the Target section.
- In the Sources section, expand Ledger.
- In the Target section, expand topLevelArray.
Map the following fields from the Sources section to the fields in the Target section:
Source Target LEDGERNAME LEDGERNAME SEGMENT3 SEGMENT3 SEGMENT4 SEGMENT4 FIN_CATEGORY FIN_CATEGORY -
Your map should like this:
Click Validate.
A confirmation message appears.
- Click Close.
- Click Save to save the integration.
Define the Tracking Fields
-
In the Integration canvas, you should see an error icon
 next to the Last Saved field.
The icon shows the number of errors you need to fix in your integration. You should have one error. To fix this error you need to add business tracking identifiers.
On the Integration canvas, click
 ,
and then select Tracking.
,
and then select Tracking.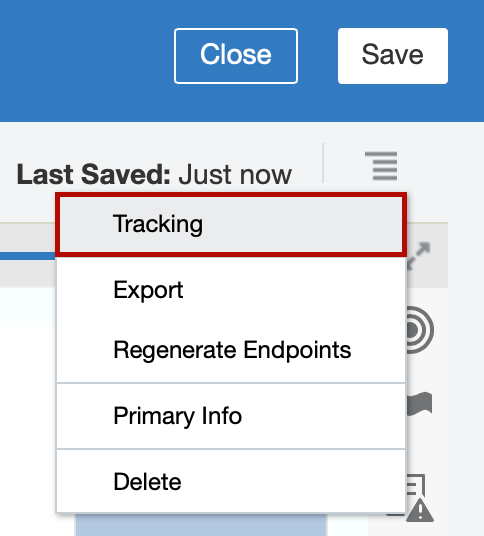
The Business Identifiers for Tracking dialog appears.
- From the Source section, select LedgerName, and
then click
 .
.
-
Click Save.
Notice there are no errors.
- On the Integration canvas, click Save, and then click Close.
Activate the Short BIP Report Integration
-
On the Integrations page, locate your integration and hover over it.
The name of your integration is
Short BIP Report.When you hover over the integration, a set of actions appear in the Status column.

- Click
 .
. -
Select Enable Tracing, and then select Include Payload.
Typically these options are disabled in production environments, but we'll enable them for the purpose of this lab.
-
Click Activate.
The activation will complete in a few seconds. If the activation succeeds, a confirmation message appears at the top of the page, and the status will change to ● Active.
Run the Integration
- We can test our integration right from Oracle Integration.
-
On the Integrations page, locate your integration and hover over it.
The name of your integration is
Short BIP Report.When you hover over the integration, a set of actions appear in the Status column.

- Click
 .
. -
Click Test.
Configure the URI parameters:
- ReportAbsolutePath:
/Custom/Financials/GLCCReport.xdo - LedgerName:
US Primary Ledger
- ReportAbsolutePath:
- Click Test (in the upper right of the page).
- Expand the Response section to verify that you got a successful response and verify the Status is 200 OK.
Click
 to open the navigation panel.

Click Integrations in the top level navigation pane to return to Home.
- From Home, click Monitoring, then Integrations, then Tracking.
-
Find the integration with your integragtion name and click the Ledger Name link to open the integration instance.
The flow is colored in green to indicate that it ran successfully.
-
Click
 and select View Activity Stream.
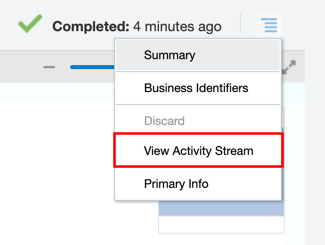
- Review the flow and messages from your integration.
- Click Close when done reviewing.
Congratulations!
Congratulations! You have invoked an integration from a web client using REST. On the Oracle Integration side, you've called a service, convert the response to JSON, and sent the data back to the web client.
